ABOUT
FEEDSCONTACT
EMAIL DIGESTCANDY RATINGSTYPE
BRAND
COUNTRY
ARCHIVES
|
Behind the ScenesWednesday, November 25, 2009
My Bay Area Candy Adventure
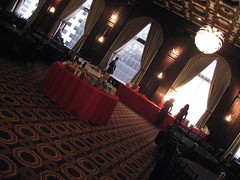
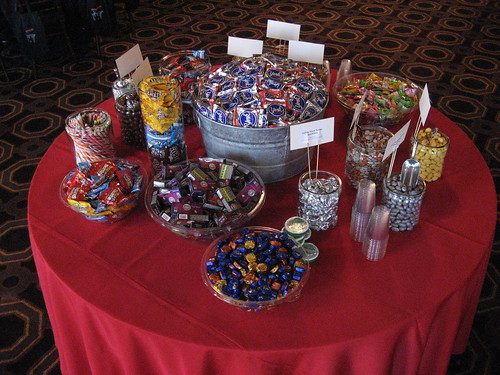
Still, I had lots and lots, so I volunteered to create a Candy Buffet for the National Novel Writing Month‘s annual fundraiser called The Night of Writing Dangerously held in San Francisco on Sunday, November 22nd. Since there were going to be two hundred attendees, each wonderful fundraisers that deserve copious amounts of sugar, I thought a pound per person would be appropriate. So I packed up my car with nine boxes. Three were candy jars and the rest were filled with candy.
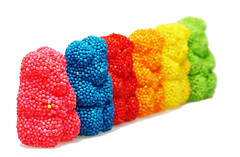
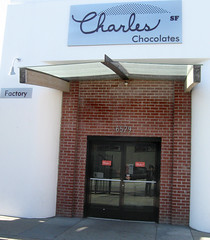
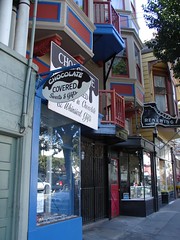
I had two cases of York Peppermint Patties from an art director for a commercial shoot here in Los Angeles, Kencraft Old Fashioned Candy Sticks, two gallons of Kasugai Fruit Gummis, Koppers Limoncello Marzipan, Koppers Dark Chocolate Almonds, Koppers Hazelnut Sea Shell Brittle, Salt Water Taffy and Butterfly Candy Tarts. I was worried that wasn’t enough, so I contacted Mars and asked if they could donate something for our good fundraising writers who supported our programs to create writing curriculum for schools & libraries for free and they sent over 1,000 pieces/packages of Snickers, Skittles, M&Ms Milk Chocolate, M&Ms Peanut, M&M Minis and Dove Promises. On top of that, another local Los Angeles event planner had some M&M Premiums in those individual serving boxes for us to pop into the tote bags. Still, I was feeling like we were missing some basic candy food groups, so I spent some of my own money and ordered up 10 pounds of Albanese Confectionery’s World’s Best Gummi Bears, 5 pounds of their Sour Gummi Bears and 5 pounds of the Double Dipped Malted Milk Balls (I should have set a pound aside for myself, they’re so good). So now I was not only feeling pretty good because our fundraiser raised $33,000 for our programs, I’d also unloaded a bunch of candy that was taking up a lot of space in my house and office. My process of celebration began with ... acquiring more candy. Bi-Rite Market - 3639 18th Street, San Francisco. Christopher Elbow - 401 Hayes Street, San Francisco Miette Confiserie - 449 Octavia Street, San Francisco The Candy Store - 1507 Vallejo Street, San Francisco Then Monday morning I packed up my candy jars and headed tried to go to Harry and David near my hotel as they always seem to have fun holiday candies, but they weren’t open yet. I made my last stop: Charles Chocolates - 6529 Hollis Street, Emeryville So this isn’t the normal candy review, just a peek behind the scenes at a combination of my obsessions. But hopefully it gives you some sense of what kind of candy lifestyle is behind the Candy Blog. It’s a pretty good life, and for that I am thankful. Thanks for reading, thanks for leaving comments and most of all, thanks for making Candy Blog part of your life. Your support of it enables me to do all this other stuff to spread the sweet joy. POSTED BY Cybele AT 12:30 pm Bay Area • Behind the Scenes • Candy • Featured News • Wednesday, July 2, 2008
Summer 2008 Candy Giveaway!I’ve got forums and you want candy. So let’s make a deal: simply register and create a profile on the new Candy Forums between now and July 15, 2008 and you’ll be eligible to win an exceptional package of summer-safe candies shipped right to your door. It may include (depending on your tastes): And whatever else I may have hanging around that you might fancy. I guarantee at least 5 lbs of candy to one new forum member! Should there be more than 200 new registrations before July 15th, I’ll add another prize package, so tell your friends! Candy shipping can only be done in the US & Canada ... however if the winner is not in North America, I think we can work out a prize package (a gift certificate to an online candy shop in your area). So just go to CandyForums.net and register. Be sure to fill in at least some of your profile with your general location and chose a zippy avatar (I created 50 default ones to chose from). You can also add a photo (I even added one to mine), tell everyone a little about yourself and link to your website. As CandyForums.net grows I’ll be adding features and it will get a top to bottom redesign with special candy themed profile pages, but I was so excited to start the community this summer. This way you can give feedback on what you want and it will become some place special for all of us. UPDATE 7/6/2008: Looks like there are over 200 members now! This means the giveaway has rolled over and there are now two prize packages! (Still to be drawn at random from eligible members, and by eligible I mean you can’t be married to me or one of my siblings.) POSTED BY Cybele AT 6:23 am Behind the Scenes • Candy • Featured News • Friday, June 6, 2008
Candy Blog Photography
Now that you’ve seen my current photo studio, I thought I’d back up a bit and show you how I used to take photos before 2006, because you really don’t need all that if you’re on a budget and especially if you’re not doing the volume I do. WHAT I SHOOT WITH My camera is the Sony DSC-V3. I bought it used on eBay for $375 in March 2006 and it included a 1 gb memory card (which I actually fill up in one photo session from time to time but more importantly it’s fantastic for my whale watching). WHERE TO SHOOT I had two spots I liked to take photos:
I didn’t have a tripod, I’d just place the camera on a book or notebook (angled if I needed it), set the shot up and then turned on the timer (this left both hands free for holding the cardstock for bouncing the light).
The light was much better up there, most the time I’d set up a piece of white posterboard, sticking one side to a cardboard box and letting it slope down onto the surface of the table. This was under a white patio umbrella, which provided a nice diffuse light and of course I’d use the other pieces of posterboard for bounce. On these occasions I used a tripod, which gave me much more control and crisper shots.
While some folks call my old methods a little ghetto, I still take photos like that from time to time. Just some white office paper to grab a quick snap and when I’m traveling, sometimes I pick up some posterboard so I can take some product shots on the road. The other option, of course is to get some studio lights. The photo of my studio looks kind of jumbled, and believe me, it’s pretty much chaos all the time. SETTING UP THE SHOT While the photos may show the candy isolated in the middle of nothingness, believe me, there’s lots nearby.
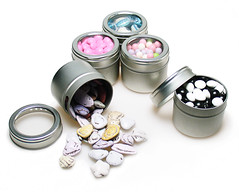
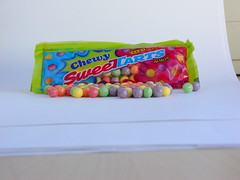
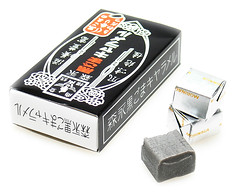
Silver reflective packaging is a bugger to shoot, everything has to be masked around it or else it shows up as a reflection. I have a piece of white posterboard with a little hole the size of my lens for just such occasions. The bonus is that it also bounces a good deal of light, so it gives a crisper, more even exposure. The trick here is to light the background and foreground at the same level. This will give the best base for the high key white. I also keep the objects quite close to the edge of the table, about 1/3 of the distance to the curve of the back (you can see that I didn’t do that in earlier shots, that’s part of what creates that shadowy background). A tripod is essential to product photos. It’s the best way to get clear and sharp photos, especially for longer exposures. Tripods are not expensive, so even if you can’t afford a shooting table like this, get a tripod.
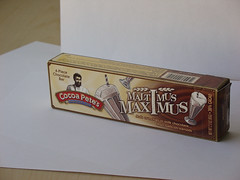
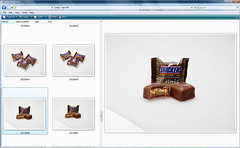
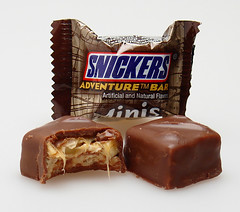
I work from the outside to the inside. It’s common sense, but something I’ve messed up on before. I shoot the outside of the package (sometimes right after I buy it and don’t complete the rest of the process until I schedule the review), then open it, shoot the item with the wrapper, sometimes solo ... then and only then do I break it open or take a bite. Sometimes, if I have a bounty of individual items, I’ll do several versions to get the best “bite with caramel pull” or “cross section of panned nut.” At the end of the session I usually have a dish of bitten candies. The shooting surface is a matte plexiglass. I wipe it down with 409 quite often, either because it’s gotten sticky or because I plan on eating whatever I place on there later. When I was shooting on posterboard I would often throw a piece of white office paper down when I knew I was going to have something gooey. POST PROCESSING THE SHOT
I always take pictures on the highest setting (the full 7.2 megabytes). Most of the time I use the plain old JPG setting, since these photos are for web. If I were doing something for print, I’d probably use TIFF or RAW - but then I’d run into storage issues. As it is I have about 60 gb of candy photos. If your camera has something called bracketing in the settings, I recommend giving it a try. It bumps the exposure up one level and down one level, taking three shots pretty much at the same time. This is a good way to see what levels would be best for a particular shot without moving the settings. For the most part I use the program mode (P) on my camera. I set the exposure bumped up to +1.7, even so, the background rarely turns out white. It’s gray.
If I’ve done everything right then all the photo needs is a little adjustment in the Photoshop Image > Adjustments > Curves menu. I push the upper white a little brighter and usually pull down the midtones a little darker. That’s it. BTW - you don’t even need the full Photoshop to do this. Photoshop Elements (which I got for free with my Wacom graphics tablet) works perfectly fine. Some other free image adjustment programs also do a great job - the best thing to do is take a great shot that needs only a few adjustments. But sometimes I’m sloppy and a few more adjustments are necessary. I might clone out some crumbs and sometimes the corners are a little darker for very large field shots so I’ll whiten them with the eraser or paintbrush.
Then things might need a little additional help, maybe a little burning/dodging for glared spots or things that are too dark in the shadows and lose their detail. Cross-sections might need a bit of dodging to enhance the difference between the caramel & nougat or at least bring up the contrast in that small area.
RESIZING FOR THE WEB For the most part I’ve moved to Flickr to host my photos and share them there (for a while I had them both on my own server and on Flickr). Flickr automatically resizes the photos to three useable sizes: 100 pixels, 240 pixels and 500 pixels. Flickr has a limited but good photo editing service called Picnik that will allow you to do some of the above adjustments right there. Picasa also offers some excellent hosting & editing services. If you’re hosting your own photos it’s usually best to use your photo software to create the web version so that it will be sharp and small at the same time. Photoshop has a “save for web” feature that allows you to preview exactly what the photo will look like saved at various compression settings. DEVELOPING A STYLE The style of Candy Blog photos is supposed to be clinical. My original idea with my photography was for it to be a true representation of both the candy and the package. Because the blog was supposed to do what I wanted the internet to provide for me - a breakdown of what that candy actually is. (I couldn’t find a site that did that, so I made one.) I like the photos on a blank white background, no background stuff to interfere. It isolates the subject and it really helped me to focus on just the candy itself, if only for that brief session when I photographed it. Yes, many of them are quite tasty looking, but I’ve always done my best to show what the candy actually looks like. I’m not trying to sell you anything. (There first dozen or so posts on Candy Blog actually don’t have the candy featured. It wasn’t until a couple of weeks later that I realized that’s what people really wanted to know ... what’s inside that box.) I set up my shots to be eye level with the candy for the most part, like the candy is as big as you are. TIPS FOR SHOOTING GOOD PHOTOS TIPS TO MAKE YOUR PHOTOS EVEN BETTER
More reading: Related Candies
POSTED BY Cybele AT 8:42 am Behind the Scenes • Candy • Featured News • Photography • Friday, May 9, 2008
Chocolate Storage SolutionsSince the temperatures were back in the nineties in Los Angeles and I just returned from a long road trip, I thought I’d discuss chocolate storage for cocoa butter hostile climates.
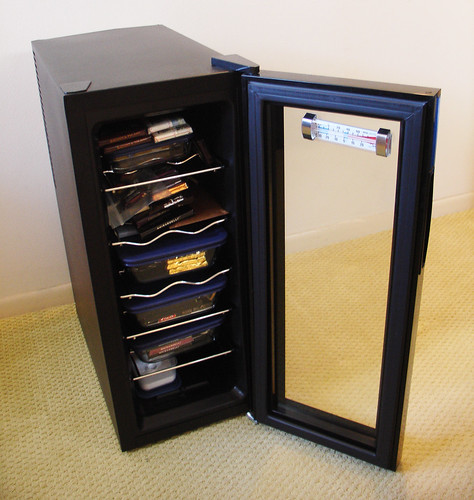
Freezing or even refrigerating chocolate can encourage sweating (condensation) and transfer of odors from other foods. I simply don’t use my fridge for my candy. It’s never worked out very well, it’s too cold. Also, if you do end up freezing your chocolate, it’s important to bring it back to room temperature slowly - first in the fridge, then into a cool room. (Too much work & planning! I want my chocolate now!) If you have a nice cool cupboard (preferably on an inside wall away from appliances that get warm), just keeping your chocolate sequestered should be fine. I have a set of Pyrex containers that won’t transfer odors and seem to give a bit of insulative protection. It also helps to have a climate controlled house. I don’t have central air and Los Angeles can experience some wide swings, temperatures inside my house go from the low sixties to over 100. (I’ve taken clothes out of my dresser that feel like they just came out of the hot dryer.) These glass containers at the moment reside in my Chocolate Fridge. Technically it’s a wine fridge (meant to hold a dozen bottles). I’ve repurposed it to hold chocolate by amping up the temperature to 65 (instead of 55, which is where you’d probably keep your wine). Because wine fridges don’t dehumidify, the glass is also good for protecting against moisture. It also helps to prevent transfer of flavors and odors. Mint and Coffee items are additionally wrapped in ziploc bags and kept in separate containers from other non-flavored chocolates.
That’s what things looked like about a month ago. I ended up taking out two of the shelves and just stacking some of the glass containers because I have so much stuff. Yes, be sure to stagger things to encourage circulation, but also remember that a full fridge is more efficient than an empty one because the stuff inside insulates itself. I bought a little thermometer to keep on the inside as well to monitor the temperature. There wasn’t anything on the settings, just low-med-high, so I wasn’t sure what I was getting, right now I have it set on low and the temps have been 62-65 ... well within the ideal range. (That little white thing at the bottom is a container of baking soda, also to absorb odors.) Some folks also love to use charcoal briquettes to absorb odors and control humidity - just be sure to get ones without lighter fluid in them, which will result in an unpalatable flavor. While this is elegant and all that, it’s also expensive to buy and of course requires electricity (no good for brown outs in the summer heat). However, if you’re the type of person who is spending $8 a piece on bars, or place orders online for quanties far larger than can be consumed in a week, it may make sense in the long run.
I don’t actually freeze the cold packs I use, but sometimes I toss them in the fridge overnight. I don’t want to freeze anything or shock it, I just want to keep the climate consistently under 70 degrees. When I put them back in, I usually wrap them in a paper towel, just in case they cause a bit of condensation. (I’m thinking of making sleeves for them out of old fabric napkins. Cold pack cozies, anyone?) Then if I don’t have any other candies that must be kept cold I fill in with other candy, just for insulation value. If I don’t have any candy sitting around sometimes I use throw pillows or bubble wrap. A full cooler will stay cool better than one with a large gap of air in the top. When returning from San Francisco, because I took more candy up there than I brought back, I ended up stuffing two wool sweaters on the top of the cooler as insulation from the glaring sun from my hatchback window. I also placed a windshield reflector over the cooler to give an added measure of protection against heat. Another solution is water bottles. I have quite a collection of sport bottles that I just fill with tap water. The large mass of room temperature water provides yet another layer of insulation. I could also put them in the fridge for a while should the temps rise (this is a great solution if you don’t have access to those cold packs - but again, if it’s humid they will sweat, so put them in a clean cotton sock or something). I also have an old styrofoam cooler box that I got a gift of cheese in once. For the most part, I just put stuff in there as a storage space for things I pick up on sale (my Hershey’s Eggs in this case), but as it’s been getting warmer I’ve tossed a few cool packs on top. For shorter trips around town, remember that your car is a portable solar oven. Leaving stuff in the trunk or back seat is asking for moltency. Again, a cooler is a wise choice, and those insulate lunch bags can be rather helpful as well. If you have no choices, put lots of layers around the chocolate and water bottles or any large volume of liquid is your friend.
Finally, for carrying to parties or a special picnic, why not consider this wide mouth Soup Thermos:
As I found out, it doesn’t do much to protect candies from changes in air pressure. Here are some other resouces about how to store your chocolate goodies: Do you have any solutions, or words of warning? Related Candies
POSTED BY Cybele AT 8:26 am Behind the Scenes • Candy • Featured News • Shopping • Sunday, April 27, 2008
Saturday’s East Bay ChocolateMy Saturday schedule in the Bay Area was focused on the East Bay (Oakland, Emeryville and Berkeley). I had a meeting in the morning and a dinner planned, so my mid-day hours were devoted to the further amassing of sweets. I didn’t buy as much, mostly because I already have so much stuff from my previous days, these were kind of informational, not acquisitional.
Total: $26.00 Sampled: raspberry truffle Lovely shop that is at once spare and comfortable without feeling sterile. There are even some sugar-free selections. Michael Mischer himself was there, I asked him about the salted peanut butter cup that I tried the day before at Fog City, alas, he didn’t have any more of them. So I got a plain peanut butter and a salted caramel ... I can put them in my mouth together. Charles Chocolates
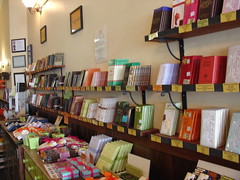
Sampled: chocolate covered matzah, triple chocolate hazelnut Total: $52.52 Sweet Dreams I stopped into this old fashioned candy shop & gift store. I didn’t buy anything there, not because it’s not a good store, but much of the inventory is stuff that I’ve already reviewed. They have a nice selection of class bulk candies (sour balls, mary janes, imported hard candies, Koppers cordials, etc.), some chocolate candies in the case and the usual fun candy novelties.
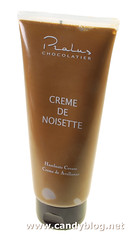
Total: $31.90 No samples. I asked about the Pralus bars, the fellow said that the best was the Sao Tome, but beyond that, I couldn’t seem to get much interaction going about the chocolate. (Two of the folks were eating and the manager was chatting with some regular customers.) It was probably one of the loudest cafes I’ve been in for quite a long time. I’ve been in the shop before, so I think I just caught them at that bad moment after the lunch rush while everyone needs a little break. They have an amazing selection of chocolate bars on display, like some cafes will have poetry books. Total for the day: $110.42 I’m packing up my car this morning to get ready for the drive back to Los Angeles. This time I’ll be taking the 5 South, which goes through the intensely-agricultural San Joaquin Valley. Not really much to stop for candy-wise. That’s fine, I have plenty. You can look forward to the inventory from my three day adventure to be photographed copiously and reviewed here. Related Candies
POSTED BY Cybele AT 5:50 am Bay Area • Behind the Scenes • Candy • Shopping • Saturday, April 26, 2008
Friday’s San Francisco Candy Adventure
In the past three years I’ve visited Miette Confiserie, Ricchiuti Chocolates, Jelly Belly’s factory, Scharffen Berger, Charles Chocolates (in both their old & new location), CocoaBella, Fog City News and The Candy Store. On Friday morning I packed up my car (my destination was Oakland for a meeting at 4PM at the National Novel Writing Month headquarters, but there were many zags and zigs along the way) with a nicely chilled cooler ready to be filled. Well, it actually held three boxes of candy bars and another six or seven pounds of other stuff for the staff to munch on. Here’s how the day went:
Total: $57.65 Sampled: Caffarel flower bud, Domori Porcelana?, Vegan/Raw chocolate from Marin and something else that I’ve spaced on completely. I had an absolutely awesome talk with Jack who runs the place. He’s tasted everything there and is really committed to his inventory. He tries to carry the best bars that each company has to offer (so you won’t find all of the Domori ... or anyone’s line). He also does a lot of repacking, so you can just buy a package of two Lillie Belle truffles, and then two Cluizel Champignon ... it’s the best thing for candy lovers who are still searching for the most amazing experiences. (And if it’s not an amazing experience, then you’re only out a couple of bucks!)
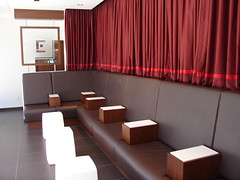
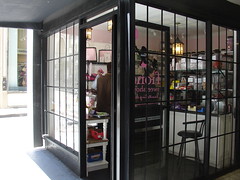
Total: $27.50 Sampled: Ecuadoran single origin bonbon. An interesting new space. Rather clinical and spare, it reminds me more of Los Angeles than San Francisco. The selection is immense and includes Elbow’s bonbons and prepackaged items (bars, chocolate covered nuts & gift packages) as well as a brief menu of cafe selections. I made my chocolate selections (picking some of the items that I’ve tried before like the Strawberry Balsamic that used to be in white chocolate and is now in dark) and picked out a hot chocolate. I had it prepared to go, but did sit for a moment in the lounge area. The woman who prepared my chocolate that morning (it was about 11 AM) said that things would usually get very busy in the evening, as it was a popular after dinner spot for people to come on Friday and Saturday nights. (This is exactly the thing I want in walking distance from my house!) After making some notes for myself I walked over to: Miette Confiserie
Total: $12.93 Sampled: Haribo Smurf (actually a raspberry jelly candy, not a gummi) Again, a lovely experience as I got to chat with Caitlin (one of the owners) about Napoleon bonbons & the little tins they come in, licorice and the lack of similar candy shopping in Los Angeles. (Though we’re coming along.)
Total: $8.25 I found out about the shop on SFGate.com. It wasn’t quite as impressive as the story (and comments) made it sound. It was very small, I didn’t feel like I could look at everything and I was rushed (and didn’t get to finish ordering my items before my card was swiped and I ended up paying cash for my Turkish Delight). I actually meant to try a couple of other things, but didn’t see them until after that ... sigh, there’s always next time. The cool thing is that it’s walking distance to Fog City & not far at all from the Ferry Terminal. Fog City News
Total: $27.92 (Discount! 20%) Sampled: Michael Mischer Salted Peanut Butter Cup (awesome but really salty) & Amano Ocumare. Had an excellent talk with Adam, who runs Fog City. (He recognized my name when I signed up for the newsletter so I could get some discounts on my bars. I don’t necessarily hide my identity but I don’t go up to the counter and say, “I blog about candy, now gimme some!”) They have an awesome sale on Amano right now (25% off) if you’re in the neighborhood. My favorite is definitely the Ocumare. Lucca Delicatessen
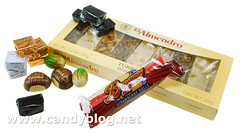
I stopped as I was walking down the street because I spied some La Florentine Torrones, but was so pleased to find the BruCo Anise bar.
Total: $9.76 I read about this shop on Chowhound and definitely wanted to see how it measured up to the grand San Francisco tradition. It has a very young vibe to it, it feels much more “accessible” to children. They have a great selection of gummis, traditional favorites (candy jewelry) and some crazy hard to find items like C.Howards, UK import Cadbury bars, a really good selection of Koppers ... I could go on and on. The prices per pound are specific to the candy (instead of just pricing the whole shop at one point which makes things like Smarties crazy expensive and chocolate malt balls kind of reasonable), so you get what you pay for. I had other places on my list, like Z Cicciolato and XoX Truffles but I really needed to balance out my purchases of perishable items, so they’ll have to wait until I return in the summer. I’m kind of logging all this stuff so you’ll know what sort of items you can buy at these shops, and what they cost. (And also because I have a tendency to forget these things.) Total spent today: $153.77 (yeah, I’m kind of feeling candy buyers remorse, mostly because I haven’t actually eaten any of it, I just get to look at it and tally up how much money I spent, not how much enjoyment I’m getting). POSTED BY Cybele AT 7:22 pm Bay Area • Behind the Scenes • Candy • Shopping • Thursday Candy Trippin’I’m in Oakland, CA right now, just back at the apartment I’m staying at for a little rest. Mostly I wanted to take a moment to begin documenting what I’ve been doing. Usually when I come up for a weekend, I pay for my lodging (as well as the gas). This time I’m fortunate enough to have a friend putting me up for two days (thanks Chris!) so with the money I’ve “saved” I’m throwing it all into candy. (I have to wonder if I can actually spend $150 a day on candy ... hmm.) On Thursday morning I headed up to San Francisco for a long weekend. Usually when I go to the Bay Area from Los Angeles I take the 5, which is very fast and efficient but rather boring (as there’s very little of interest to candy-minded people besides what can be found at a gas station). So I decided to take the slightly longer & slower 101 N route.
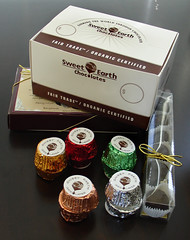
San Luis Obispo is about three and a half hours north of Los Angeles, so it’s a pretty quick drive and a logical place to stop for a cup of coffee anyway. Sweet Earth Chocolates is an organic & fair trade confectioner based right there, they also sell their sweets right from the Splash Cafe, so it was perfect rest/candy stop. Sweet Earth Chocolates @ Spash Cafe Here’s what I picked up (some for later review): (plus a vegan turtle sample) Total: $36.42 This is also the point where I stopped for gas. That was $33.57 (I have a Prius ... which doesn’t hold a lot of gas, so even at $4.09 a gallon, I only needed 8.2 gallons). The other high priority stop for me along the way was in San Jose, which is another three hours north of San Luis Obispo.
Holland’s Best (aka Holland Pastry & Gift Shop)
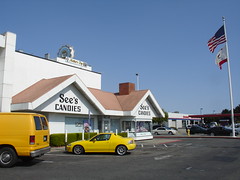
(plus a trollendrop sample) Total: $39.88 The last stop was mostly because I was there, literally, it was just an exit off the freeway. So I stopped at the See’s Factory, which has a little store attached. Now, as far as I know, See’s rarely has “outlet” sales. I know that some folks pick up after-holiday merchandise there on sale, but that’s pretty rare. I didn’t find any grand deals there, but I was happy to see the homeland of happy-habit chocolates.
(plus a Mocha Truffle sample) Total: $11.40 So that total for Thursday: $122.66 (includes departure cup of coffee at Winchell’s in Silverlake). POSTED BY Cybele AT 11:28 am Behind the Scenes • Candy • Shopping • Thursday, April 10, 2008
Candy Blog’s Happy 3rd Anniversary
Since my first post on April 9th called Adventures in Candy, things have changed quite a bit. I was not new to blogging at that point, I’d been keeping Fast Fiction since 2001 and blog regularly for blogging.la since early 2004. I’m not sure I realized how much it would take over my life.
There was something about blogging about candy. It just clicked. People I’d never met started reading. I had fun and I realized that I’d been writing about candy my whole life. From the short story in 5th grade to essays in high school to my masters thesis, a river of candy ran through it.
So I hired Hop Studios in late 2005 to redesign the blog which meant great new features like following comment conversations, the regular polls, related candies, search, the fun ratings & specs chart and intensive category tags.
I continue to work with Hop Studios, tweaking functionality, adding new features and of course just fluffing it up once in a while. There are over 1,200 posts here on Candy Blog so far. I don’t know for sure how many products I’ve reviewed (some posts include multiple reviews), but I put that number at about 800. My flickr Candy photoset has documentation of over 2,100 product photos (including at least 200 things that I’ve tried but never reviewed) .
Readers are a big part of things here too, there are 12,700 comments logged here from you (and another 800 or so responses from me). I have no idea of the number of people who have visited the blog over the years. My statcounter says 4.6 million page loads since November of 2005 (and that doesn’t count me). The best part is that I’ve come to know so many of Candy Blog’s readers by name, via emails and through their blogs linked in the comments.
I’ve traveled for Candy Blog, covering the 2006 & 2007 All Candy Expo (the largest trade candy show in North America), the 2007 & 2008 Fancy Food Show, the 2007 & 2008 Natural & Organic Products Expo and trips to candy factories in Pennsylvania & California. No matter where I go in the country, I try to see what’s going on in the local confectionery.
But for the most part Candy Blog has become a faithful review site, five a week ... sometimes more, every once in a while I take a day off.
Late last year I did add an extra layer of insulation from advertising concerns by taking on my husband as my publisher. He talks directly to people interested in advertising (in case they may be manufacturers) so that I don’t have to worry about that stuff.
So now it’s your turn, this is an open thread for you to request things from me. More giveaways? Forums? More recipes (though I fail at most of them)? Factory tours? Candy destinations? News? Buyer’s guides? Company profiles? More history ... it’s your call. Related Candies
POSTED BY Cybele AT 9:35 am Behind the Scenes • Candy • Featured News • 
|
Meticulously photographed and documented reviews of candy from around the world. And the occasional other sweet adventures. Open your mouth, expand your mind.
SEARCHSearch the Candy Blog archives
    
FEATURED NEWS ITEMS
COPYRIGHT NOTICEAll content (text and photos unless otherwise credited) is copyright 2005-2026 by Cybele May Please do not use my photos without prior permission directly from me, they represent what I ate in preparation for these reviews and are not to be used for other purposes. Design by Hop Studios
|
|||


 At first I envisioned Candy Blog as a place to experience new candy, or at least candy that was new to me. Part of what I wanted Candy Blog to be was something that I couldn’t find on the internet then, someone to tell me what was really inside that package. This was especially true for regional candies and foreign items. As the years have gone by I realized that I needed to revisit the tried and true favorites in order to give the new items perspective. There are still plenty of classic candies missing from the blog. I will get around to them eventually.